Saptak's Blog Posts

What's the preferred unit in CSS for responsive design?

Posted: 2018-04-04T17:16:00+05:30
Obviously, it's %. What a stupid question? Well, you can sometimes use em maybe. Or, maybe vh/vw.  Well, anything except for px for sure.

Sadly, the answer isn't as simple as that. In fact, there is no proper answer to that question and depends a lot on the design decisions taken rather than a fixed rule of making websites responsive. Funny thing is, many times you might actually want to use px instead of % because the later is going to mess things up. In this blog, I will try to describe some scenario's when each of the units work better in a responsive environment.

PS: All of this is mostly my personal opinion and working experience. Not to be mistaken as a rule book.


Where to use %?

Basically, anywhere you have certain kind of layout or grid involved. I use % whenever I feel that the screen needs to be divided into proportions rather than fixed sizes. Let's say I have a side navigations area and the remaining body in a website. I would use % in this case to measure the margins and the area of distribution. Since I definitely want to vary them on changing screen. Or a grid of rows and columns. I will want the width of the grid to be in percentage so that the number of columns allowed change with the width of the screen.

Another use of percentage is while determining the margin of an element. You might want to have much more margin on a wider screen than in a smaller screen. Hence, often the margin-left and margin-right are advisable to be in percentage.

Also, for fonts and typography elements, you should use % since px isn't compatible with W3C standards of accessibility.

PS: A lot many times, it is preferable to use flexbox and grid layout instead of trying to layout things via margins and floats.

Where to use px?

To be honest, yes, it is better to avoid px when you think of making things fluid in responsive. But having said that, there are some cases where even in a fluid design, you want things to have a fixed value. One of the most commonly used examples is top navigation height. You don't want to change the height of the top navigation bar's height with the change in screen size. You might want the width to change or show a hamburger button instead of showing the list of hyperlinks, but you most often want to keep the height of the navigation bar fixed. You can either do it by setting height attribute of CSS or maybe you want to do it with padding, but the unit mostly should be px.

Another use would be for margin of an element but this time the top and bottom margins instead of left and right. Mostly, when you have your website divided into sections, you would want the margin between the different sections to be of a fixed value and not to change with the screen width.

Where to use em?

em is mainly to be used while setting font-sizes and typography elements. By that I mean wherever I have a text involved it is often good to use em. The size of em basically depends on the font-size of the parent element. So if the parent element has 100% font-size (default browser font-size), then 1 em = 16px. But em is a compounded measure. So the more and more nested elements you have the idea or measure of em keeps changing. So it can often be very tricky to work with em. But this is also a feature that might sometimes help to get a compounded font size.

Where to use rem?

The main difference between em and rem is rem depends on the font-size of the root element of a website(basically root-em) or the <html> element. So whatever be the font-size of the root element, rem is always computed based on that and hence unlike em, the computed pixel value is more uniform throughout the website. So rem and em usability depend highly on the use case.

Where to use vh or vw?

vh and vw stand for viewport height and viewport width. The advantage of vh or vw over width is that you can control based on both the height and the width of the media screen that appears in the viewport. 1vh basically means 1% of viewport height. So if you want something to take the entire height of the screen, you would use 100vh. This has applications in both setting width and also setting font-sizes. You can mention the font-size of a typography will either change based on the height or on the width of the viewport instead of the font-size of your parent element. Similarly, you can also set line height based on viewport height instead of the parent element measures.

Where to use media queries?

Even after using all of the above strategically, you will almost necessarily need to use media queries. Media queries are a more definitive set of CSS codes based on the actual media screen width of the device. Mostly, we use it in a conditional way similar to other programming languages. So we can mention if media screen width less than 720px, make this 10% wide, else make it 25% wide. Well, but why do we need it? The main reason for this is the aspect ratio of screens. In a desktop, the width of the screen is much more than the height and hence 25% wide might not occupy a whole lot of screen. However, in a mobile screen where the width is much smaller than the height, 25% might actually occupy more area than you want it to. Hence media queries are needed so that when there is a transition from wide screens to narrow screens, even the percentage widths are changed.


As far as I feel, there are use-cases and scenarios where each of them might be useful. Yes, px is the least used unit if you are concerned about responsiveness, but there will definitely be some elements on your website to which you want to give a fixed width or height. All the other measures are changing, but the way they change is different from each other and hence depends a lot on the designer and the frontend. Also, CSS4 has added a lot of new features which at least make handling of layout lot easier than before.

FOSSASIA 2018: Conference Report

Posted: 2018-04-02T10:44:00+05:30

FOSSASIA 2018 was my 2nd FOSSASIA conference and this year it was at a new venue (Lifelong Learning Institute), and for a longer time. As always, there were a lot of speakers and a lot of really exciting sessions. Last year I was a little confused, so this year I planned earlier which all talks to attend and what all to do.

22nd March (1st Day)

The opening ceremony was kicked off by Harish Pillay and Damini Satya, both of whom did an incredible job on hosting the entire day. The opening ceremony was followed by the keynote talks and a panel discussion which lent a great insight into how open source, AI, blockchain and all other modern day technologies are working hand in hand with each other. Harish Pillay also shared his view how he thinks AI won't take over the human beings but rather human beings will evolve to become something which is a combination of human beings and AI and hopefully have a good future. I do agree with him to some extent.

Hong addressed the audience stating the primary focus of FOSSASIA in the next few years and how it involves helping more developers get involved in open source and making new cool things. Codeheat winners were awarded next for their wonderful contributions in different FOSSASIA projects. The mentors of the projects were also honored with medals, which was kind of something I wasn't expecting. Then, it was time for the track overviews to help people understand and know what the different tracks were all about. We told what the tracks were and why the audience should be interested. With that, it was time for the most important track - The Hallway Track. So people talked and networked in the exhibition area for the rest of the day.

23rd March (2nd Day)

I was the moderator of the Google Training Day and also the cloud track in one of the rooms. Which meant getting up early, and reaching there on time. Fortunately, I made it on time (I still don't know how). Being the moderator, I was there almost the entire day. Which meant a lot of Google Cloud learning for me. So the talks ranged from using BigQuery to handle queries in big data to using Cloud ML to do Machine Learning Stuff. The Google Training Day talks were followed by a talk on serverless computing and tutorial on kubernetes. After that, it was again time to hang out in the exhibition area and talk with people.

24th March (3rd Day)

Today was the day of my talk. I was pretty worried the night before whether I would be able to make it to my own talk since it was at 9.30 in the morning. I did make it to my talk. But what was more surprising was, there were actually more people than I expected at 9.30 in the morning which was great. Apart from few technical glitches in the middle of my talk, everything went pretty smoothly. I talked about how we at Open Event decoupled the architecture to have a separate backend and frontend now and how it's really helpful for development and maintenance. I also gave a brief overview of the various architectures involved and the code and file structures.

After finishing my talk, I attended the SELinux talk by Jason Zaman. SELinux is a very confusing and mystified topic for most people and there was no way I was missing this talk. He gave a hands-on about setting up SELinux policy and how to use audit logs. Next was the all-women panel about open source and tech. After this was the necessary group photo where the number of participants made it a little too difficult for the photographer.

The remaining of the day was pretty involving where I mentored in the UNESCO hackathon, helped with video recording and so on.

25th March (4th Day)

The final day of the event. I was really interested in attending the talk about Open Source Design by Victoria and hence reached the venue by 10 am in the morning. It was a great insight as to how Open Source Design is involving and bringing in more and more designers into open-source which is really great. The last session I was eagerly waiting for was the GPG/PGP key signing event. Had a lot of fun helping people create their first GPG/PGP keys and signing. Met and interacted with some really awesome people there.


At last, it was time for the conference closing ceremony. But it wasn't over yet. We all met over at hackerspace where I had some great discussions with people about the different projects I work on and was really great to have their views.

All in all, it was really great meeting old friends, making new friends and meeting people whom I actually knew only by their nick. More than the talks in itself what makes a great conference is the people in it and the chance to meet them once in a year. At least that's how I see them. And FOSSASIA 2018 met that purpose wonderfully.

It works in Firefox, but not in Tor Browser

Posted: 2018-01-25T12:11:00+05:30
In today's world, where websites play a major role in providing various technical services to users, web developers have an important role. Though the war between back-end v/s front-end is never ending, nonetheless we all can probably agree on the fact that front-end does provide the non-tech users with an interface so that it becomes easier for them to use the back-end functionalities. Thus, the great problem of making front-end easy to use while also looking good comes into play. With the advent of the web, web technologies have also advanced a great deal. One of them is definitely CSS. CSS now has enough power to create a really interactive decent looking website only using it. With attributes like filter, masking and so on, you no more even need photoshop to change your images every time; with the help of grid-layout and flex you don't need to bang your head about laying out items properly on your webpage properly. Now you must be wondering why am I telling all this and not coming to the point. Well, the reason being if you don't use these new advancements (which I wonder why you wouldn't), you might not have ever come across the question. The biggest question today that a web developer faces is will the code they write actually work on all the browsers. And hence the title.

What is tor and tor browser?

Tor is a software program that helps you stay protected on the web in numerous different ways. The main idea is to keep your internet activities anonymous by not allowing the web pages to learn your exact web identity. It also protects you from people who are watching your internet activity (yup, you are being watched) by keeping them unaware of the sites you visit. 

Tor browser is a web browser that helps you use tor on various different operating systems. So as you can understand since privacy is a very important thing, so checking if the front-end you are making for a website, works in tor browser is also pretty important.

Tor browser and Firefox

Quoting Ethan Tseng and Richard Barnes from the blog Tor at the Heart: Firefox

If you’ve used Tor, you’ve probably used Tor Browser, and if you’ve used Tor Browser you’ve used Firefox. By lines of code, Tor Browser is mostly Firefox -- there are some modifications and some additions, but around 95% of the code in Tor Browser comes from Firefox.
So, basically, Tor Browser is built on top of firefox after applying some Privacy and Security patches. But this also means, to update Tor Browser, everytime a new firefox version comes means update the Privacy and Security patch codes to make them compatible with the new version of the browser. The latest version of Tor Browser is thus often not built on top of the latest version of Firefox. So how do you know if a feature is compatible with tor or not?

Will it work in Tor browser?

This question first came to my mind when I was writing some hobby code to make a Batman swiping animation. I used various CSS Masking properties. But then someone reported that it wasn't working on Tor browser. Which is when the question hit me, that it does work in firefox then why not on Tor browser? So what I found was the latest version of Tor Browser is built on top of Firefox 52.5.0esr while the latest version of Firefox is 57. So I delved into this question a little deeper and this is the steps you too can follow to know whether a certain HTML, CSS or Javascript feature is supported in Tor browser.

  1.  Start your tor browser. Open About section and there you can find the version of Firefox which is being used.
  2. Alternatively,  You can check the release notes for Tor browser to know about the Firefox version. So right now according to the release blog of the latest Tor browser till date, it is built on top of Firefox 52.5.0
  3. Go to website https://caniuse.com/
  4. Search for the feature you are wanting to use. 
  5. Then, click on show all to get the compatibility over all the versions of the common browser.
  6. Now, to understand whether a feature is compatible, check for the Firefox version on top of which the Tor Browser is built, latest being 52.5
  7. So, I, for example, checked Firefox 52 for the compatibility of CSS Masking properties, which reveals that before Firefox 53, there was only partial support for CSS Masking.

Note: This is not any official way of finding how it works, but this technique works just fine.


CSS Masking: Mask of Batman

Posted: 2018-01-04T13:23:00+05:30
Recently, I have been watching videos on CSS to know more about the various interesting features in CSS such as grid layout, flex, filter and so on. After all, it is one of the Turing Complete languages. One way I like to learn more about languages is by watching conference talks. So, I was going through the different talks in CSSConf 2015 when I came across this talk by Tim Holman titled Fun.css. It is a really fun talk but one thing that really caught my eyes was the transition between slides using a star wipe. I searched to see if I could find the code for how to do it with purely CSS but didn't get much help. This is when I decided to give it a try myself. But why Star? I would make a Bat Swipe.

So this is the final prototype I made using just CSS without any Javascript.


See the Pen Bat Swipe by Saptak Sengupta (@SaptakS) on CodePen.

The main CSS property that is used in the above example is mask-image and associated CSS Masking properties. What masking does is hiding parts of the visual section of the webpage by the mask layer. there are two ways of masking - CSS or SVG. So you can either use a CSS gradient or luminance to create a mask, or use an SVG image. In our example, we are going to take about how to use SVG.

<div class="content">
<p>Hover</p>
</div>
<div class="wipe">
<div class="content black">
<p>I am Batman!</p>
</div>
</div>

So, in the HTML code we basically have 2 layers. To create that, I made a <div class="content"> with the actual content inside a <div class="wipe">. So the text of the class "content" must remain hidden until the wipe class reveals the content.

Now it's time to implement the CSS code to make this thing happen.
.wipe {
mask-image: url(https://vignette.wikia.nocookie.net/logopedia/images/3/3c/Batman_symbol_%282008-2011%29.svg);
mask-repeat: no-repeat;
mask-position: 50% 50%;
mask-size: 0;
}

The above CSS code applies the mask over the content class so that only a part of the content is visible. Here we use mask-image which is a link to the SVG image which we want to use as our mask. Since it's a Bat Swipe, I have used the logo of Batman. You can use pretty much use any SVG image but I would suggest that you use a filled SVG image rather than line art. This is because the SVG masking uses the alpha factor of the image. Say in our case, since the Batman logo is a filled black image on top of a white background, so when we apply it as a mask, the visual area behind the black part of the image is visible, and the area behind white part gets masked or hidden.

The CSS properties mask-repeat and mask-position are used to ensure that there is only one mask no matter whatever the size of the mask and it stays always in the middle. You can modify these parameters based on your use case. Say, you wanted a polka dot mask style, you would want then want to have a black disk mask-image and mask-repeat as "repeat".

The CSS property mask-size is most important in our case to create the effect of swipe or reveal. By now, most of you must have already guessed that to get the effect, what we essentially need to do is increase the size of the image with time. I have done the entire animation of swiping on hover because it is the easiest way to display a transition with only CSS.

So at the beginning, we keep the mask-size as 0 and then we add a pseudo hover property to increase the mask-size to 500% (enough to cover the entire page over most resolutions) with a transition.

.wipe:hover {
mask-size: 500%;
transition: 3s;
}

We apply a transition over 3s using the CSS transition property. So, if you would like a really slow animation instead of a swiping action you can just increase the value of transition property so that the transition of size happens over a longer duration of time.

The only last thing remaining is cross-browser compatibility. So will this code work in all browsers? Sadly, no. As of now, the mask-image and associated CSS properties are fully supported only in Firefox since version 53. However, you can make it work in Google Chrome, Opera and Safari using the prefix "-webkit-". So if you add -webkit-mask-image property as well, then it starts working in chrome and safari as well. Sadly, IE, Edge and Opera Mini doesn't provide any kind of support.


Science Hack Day India, 2017

Posted: 2017-11-30T20:51:00+05:30
So, finally, managed to clear up some time to write about the best event of the year I have attended - Science Hack Day India, 2017. This was my second time to Science Hack Day, India. SHD 2016 was so phenomenal, there was no way I was missing it this time either. Phenomenal more because of the wonderful people I got to meet and really connect with because the entire atmosphere about the event is more like an informal, friendly unconference type. This year it was no different.


                Picture Credit: Sayan Chowdhury

Science Hack Day 2017 was truly bigger, better and even more fun than last year. Happening at one of the most happening venues, Sankalp Bhumi Farm, just the stay is so lovely, one doesn't need much other reason to attend it. Unlike last time, this year I had two friends accompanying me to Science Hack Day. We reached early morning in the 0th day. Like all conference, it was really good to meet everyone whom I personally was meeting maybe after 6 months, or an year or maybe for the very first time. There were general discussions about who is working on what and the new terminal emulator they are using, or the nginx trick that they might be using or the new great open source software they came across. But this is something everyone knows happens when techies meet. What mostly people don't know is thing like cycling and kayaking that we do. So most of the afternoon was rather spent in cycling and kayaking by everyone and having fun rather than any serious discussion at all. In the evening there was an informal introduction by everyone so that to get a little accustomed. After dinner, everyone bid goodnight and went to sleep.

But have you ever heard geeks sleeping just after dinner? Obviously not. So it was a matter of time before everyone again re-grouped at the hackerspace which was setup for the next day. Then I and Farhaan had the privilege of listening stories from a dreamy Sayan Chowdhury which marked the end of the day for us.

Next morning, after breakfast, it was time for mentor introduction which was followed by a great basic idea about how an aeroplane flight works. Reminded me of my science classes and I started wishing that we had similar explanation using a proper unmanned aircraft. And it wasn't just theory and theory, but we got to see that aircraft actually fly. This marked the actual notion of a hack day that we don't just talk, we make and also break stuff. After this it was time to start with our hacks. Unlike my plans before both me and my friends started working on assembling of a 3D printer which was mainly brought for Hackerspace Belgaum. I always thought what is the big deal in assembling but I realised I was so wrong.

The entire assembling took all day since we were doing for the first time and were figuring out stuff as we went with it. I mostly attached parts while my smarter friends figured everything out and told me what to attach where. By dinner it was ready and assembled. And I was like "Yay! Let's start printing". That is when Siddhesh told me that the trickiest part is yet to be done, that is calibration. So we got started with it. When calibration was all set and done it was time to print. So we decided to print the "Hello World" of 3D printing, i.e. a cube. So the cube started printing, the first layer got printed, the second layer got printed and by the third layer, everything came off. We realised the bed wasn't heating.

A little disappointed we settled for the day and went off to bed. Next day we decided to use glue to make the bed somewhat sticky. This time it printed. Not so perfectly but mostly all good. I have never been more excited to see a tiny little white cube and neither have I seen so many other people behave the same. After that it was time for rocket flying followed by a group photo. The event was marked with the project presentation by every team.

Hoping to come back again next year.

Uploading Images via APIs in the Open Event Server

Posted: 2017-08-15T17:52:00+05:30
APIs help us to send and receive data in some particular data format that can then be used individually or integrated with a frontend UI. In our case, the entire API server is used to manage all the requests from the frontend and send back the necessary response. Usually, the application is to send simple form data which is then stored into the backend database and a valid jsonapi response is shown. However other than normal text, url, datetime data one very important data is media files, in our case event images, user images, slides, etc. In this blog, we will particularly deal with how we can upload images in the server using API.

Sending Data


Firstly, we need to decide how do we send the data in the post request of the API. So we are sending a base64 encoded string representing the image along with the image extension appended to it, for example, data:image/png;base64,iVBORw0KGgoAAAANS. This is a widely used format for showing images over the web. So when we send a POST request we send a json encoded body like:

{
"data": "data:image/png;base64,iVBORw0KGgoAAAANS"
}

Converting Base64 Data to Image


There are 2 parts of the data in the string that we receive. The first part basically tells us the format of the image(.gif in this case) and string encoding(base64 in this case), the second part gives us the encoded string. So, from the first part, we extract the file extension for the image file to be created. We use uuid.uuid4() for a random filename.
filename = '{}.{}'.format(str(uuid.uuid4()).data.split(";")[0].split("/")[1])

Now to write the base64 encoded string as an image file, we first need to get only the encoded string part from the data and then decode it. We use string decode function of python for the decoding purpose. Then we write the data to the image file and save it.
file.write(data.split(",")[1].decode("base64")

API Response


Finally using whatever logic you are using for serving your static files, you generate the static file path for the image saved. And then create another json encoded response which returns you the url for the saved image in the server.
{
"url": "https://xyz.storage.com/asd/fgh/hjk/1233456.png"
}

And there you have your image uploaded and served.

Avoid Race Condition in CSV exports

Posted: 2017-06-23T03:15:00+05:30


One of the biggest problems that appear while writing any file in the server side is a race condition. A race condition when two or more users make request to write to the same file in the server side and since neither of the operations are completed, so there is a certain problem in the integrity of the data written and may also cause the operation to be completely blocked. So how to stop this and still maintain that a large number of files or memory is not used? Let’s see.


What is a Race Condition?


A race condition is a situation when two or more processes perform a write operation on the same file at the same time. This causes an undesirable situation since the process should be in a sequential manner. So the situation causes something like a ‘race’ between the two server requests to change or modify the same file. So in such a scenario, there is no guarantee that the data written to the file is correct or will be meaningful at the end. Maximum probability is it won’t be.


Avoiding Race Condition


The general way of avoiding a race condition is adding a file lock. We lock a file while it is being written by some user or process and prevent other users from being able to write to the file. They have to wait for the ongoing writing process to complete to start another write process. But making that might increase the wait time quite considerably for users when we are looking to export CSV data about an event.


So to keep the process fast and use the advantage of distributed system, we write the CSV for different request in different files. We create the filenames by appending a random hexadecimal string to the original filename.


Avoid Wastage of Memory


However as we can understand by the proposed method above, there will be a huge wastage of memory since a large amount of files will be created. So to avoid wastage of memory, we run a cron job. The cron job deletes all the csv files after a certain amount of time. For this, we use apscheduler.


Thus, we avoid the race condition while also maintaining that a lot of memory isn’t wasted.

Ticket Ordering and Positioning (Front-end)

Posted: 2017-06-21T13:52:00+05:30

As discussed in my last blog about ticket ordering and positioning, in this blog we are gonna talk about how we implement the front-end part of re-arranging the tickets. We essentially do it using compute and methods of Vue.js. The functionality that is expected in the front-end is, the event organizer should be able to move the tickets Up or Down the order and save that position so that it gets displayed later in that very particular order.
Like I said above we use two main things of Vue.JS for this purpose - Compute and Methods.

Compute

We use this to get the sorted list of tickets based on the position key of the tickets and use this sorted list to display the tickets in the event editing wizard. Whenever you change the value of the position for a ticket, it automatically updates the list to sorted list again and hence the order of ticket in the front-end also updates. To add a compute function in Vue.JS, inside the new Vue() object creation, we add an attribute computed and inside that we put all the functions that we are gonna use. So in our case the function is sortedTickets . We make use of the sort function of lodash to sort the tickets array based on it's position attribute.

Now while showing or looping over the tickets, we loop over sortedTickets  rather than the original ticket array.

Method

This method is called when the button is clicked to move it up or down. This makes the calculations to determine the values of the position of the two tickets which are being re-ordered in a single click. To add a method, we do it in a similar way like computed but using methods attribute instead. The methods we have written to move tickets up or down is moveTicket.

It has 3 parameters - ticket, index and direction. So when this function call is emitted, depending on the button, the direction is either "up" or "down" while the other two parameters are the ticket properties of the particular ticket. So in this function we check the direction and accordingly update the value of position for the tickets involved in the arranging. As we update the position here, because of the compute, the UI automatically updates to show the tickets in the new order.
Finally after all arrangement is done, the position is always saved in a hidden input field which is then passed as form data and is saved in the database so that the position value can be used in other pages for showing the ticket in order.

Show Ordered Ticket

In other pages, while showing ordered ticket, we already receive the ticket array in sorted format based on the position key. Hence, we don't need to worry about it in the front-end and it automatically is shown in the sorted order.

Ticket Ordering or Positioning (back-end)

Posted: 2017-06-21T13:41:00+05:30

One of the many feature requests that we got for our open event organizer server or the eventyay website is ticket ordering. The event organizers wanted to show the tickets in a particular order in the website and wanted to control the ordering of the ticket. This was a common request by many and also an important enhancement. There were two main things to deal with when ticket ordering was concerned. Firstly, how do we store the position of the ticket in the set of tickets. Secondly, we needed to give an UI in the event creation/edit wizard to control the order or position of a ticket. In this blog, I will talk about how we store the position of the tickets in the backend and use it to show in our public page of the event.

So, as you can expect of course we need to store the position information of the ticket in the database. We already have a table for tickets in our database. All we needed to do was to add a column 'position' to that table. The table would still be in a 3NF normal form since each individual ticket for a particular event can have only one position value. Since we use Flask-Migrate, all we need to do is migrate and upgrade to add this new column.
After this was done, we could ensure that once the tickets with their proper position value was submitted from the front-end, we can store the information in the database. So, we needed to store the ticket position also received from the form along with all other ticket details. Now how we get the position value for a particular ticket in front-end will be discussed in the second blog. As of now, we assume, we have a database with position values assigned to tickets and we need to show them in ascending order in the event page.

So, in other words, what we needed to do was to sort the array of tickets associated with the event object in ascending order of their position attribute. The sorted function and lambda function of python came to the rescue. All we needed was to use the sorted function with a lambda function to determine the key for sorting. So the final code for sorting would look something like this:
sorted_tickets = sorted(event.tickets, key=lambda x: x.position)
Hence, sorted_tickets will have the tickets sorted in ascending order of their position. After this we send this newly sorted array of tickets as parameter while rendering templates whenever we need to show the tickets. And voila! we get to show the tickets in their sorted order.
So this all works considering that we get the information from the front-end, which is absolutely feasible for newly created events. But what about already created events? What happens with the tickets already created in those events? How do we give them a position value?
For allowing the feature to work on already created tickets, what we do is before the tickets are sorted, we check whether the tickets have a position attribute. If position attribute isn't present, then we assign it a position attribute which is 1 more than the index of the ticket in the array of tickets. That way we confirm that the tickets can be re-arranged.
Okay. That all sounds good. But how do we re-arrange tickets in front-end? Well, for that you have to read the next blog.

PyCon Pune : Contributions, DevSprints and So Much More (The Web Developer's POV)

Posted: 2017-04-05T20:33:00+05:30
Pycon Pune Homepage
PyCon Pune was held on 16th to 19th February but my association with PyCon Pune started long time back. The heart and soul of PyCon Pune 2017, Sayan Chowdhury was looking after the website development as well. After the first draft of the website was ready, he shared the website with me and asked whether I wanted to contribute. I was more than happy, was rather honored. First PyCon Pune, one of the web developers... Awesome experience.... After that slowly I started getting involved into deployments,  talk selection, scheduling and many more. I and Kushal even went on to website updating and other stuff in my vacation.By now, PyCon Pune was not one of "their" conference, it was more like "our" conference for me. So though it was just my second proper conference, I was super excited...

Unlike most others my main work related with the conferences was much before the conference. In fact most of the work was completed more than a month ago. Firstly, the entire website was made using staticjinja. It was my first experience with staticjinja but having worked with flask, it wasn't very difficult. As one after the other keynote speakers got confirmed, I was to add there pictures and details in the website. Then after few days, I got a call from Sayan saying we need to make a registration page. I was to implement a 3 column UI with all the details. As including bootstrap only for getting it's grid help would be too much, I wrote the grid system in CSS from scratch. Which might not be a big deal for most but since it was my first time writing a grid system from scratch, I felt great when it worked.

Static Jinja Codes for the Website


Then, apart from that was looking into the responsive UI of the website. Since no front-end framework was used, so responsiveness was also something I wrote a sketch. Yes, another happy moment for me. Then we started getting few contributors as well helping us with some of the components. So the next thing was to review and merge pull requests. Thanks to the already written grid structure, it was not much pain to make the other pages. And, obviously deploying the code to the server. It was a really great experience to be involved in the web development team of a PyCon.

Conferences for me was one of the ways of spending my GSoC stipend. This time we, a group of 4 friends decided we go together, book a proper airbnb apartment and have some awesome time along with the conference. So it was also an outing for us from the college days.

Conferences as I learned from PyCon India was not only for learning stuffs and listening to talks. It was more about meeting awesome people and getting to connect with them and to grow and help grow the community. So, PyCon Pune also I was eager to meet a lot of new people and to reunite with a lot of people I met before. Also, being a volunteer I had work to do.

So the first day started of by work in registration desk. I was late ( as usual ). But anyhow got busy with work, distributing ID cards, figuring out names, meeting people whom I have met only over IRC. Soon after, the keynote started which was followed by some pretty interesting talks. There were different booths where you could learn about some exciting and cool new tech stuff and communities. The venue was awesome... And so was the food (yes, I have to tell about food)... After the day ended with some awesome talks and meeting some awesome people, it was time for the speaker and volunteers meet. Got to talk with many speakers. And again I can't keep myself from saying, the food was delicious...

Second day was a special day because one my best friends, my ex-roommate, my project partner, Vivek Anand was going to speak for the first time in a conference about his project, Pagure with Fedora, along with Farhaan Buksh. I was super excited (and he was super nervous, I guess). And it was really good. Well, most of the things he said in talk he had already told me before but his talk didn't make me fall asleep (that's the best I can manage). After that the day was filled with sticker collection, tshirt collection, tshirt distribution, group photo and all the cool stuff associated with conferences. At the end it was all bidding goodbyes with promises to meet again on internet and in some different conference in some different place.

After that, we four friends - me, Vivek, Shubham(Bhendi) and Medozonuo decided to go for a movie. Well after all The Lego Batman has hit the theaters. I know this has nothing to do with PyCon Pune but after all It's Batman. So can't help but mention.

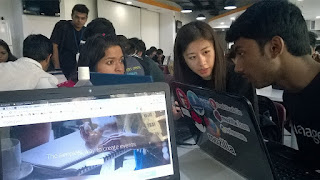
Medozonuo conducting Dev Sprint on Open Event with me


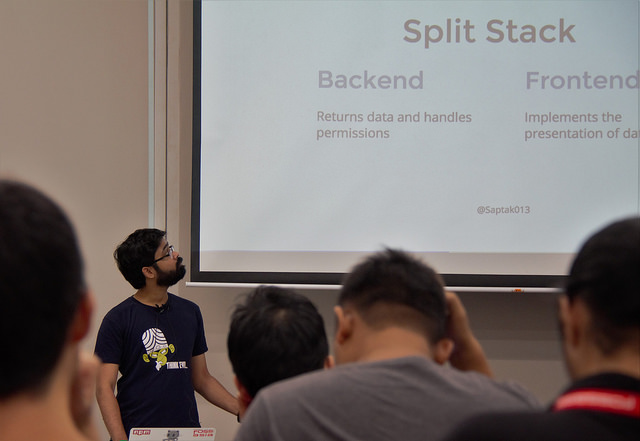
Next 2 days were devsprint. Few people were presenting their own projects. Others were contributing. I was presenting the Open Event Organizer Server project along with Medozonuo Suohu. The devsprint was at Redhat office in Pune. We got some 3-4 contributors who were really excited to know about and contribute to the project. We were ourselves solving some of the bugs that we were supposed to solve while debugging installation problem on Macs (yes, we need to improve the documentation). We managed to get 2-3 Pull Requests as well which was really good because we were getting new contributors which we really needed. There were many other projects including CPython itself which got a lot of attraction. I also sat there for sometime knowing about the codebase and scopes of contribution. Sadly, I couldn't contribute to it till now. Also, there were hardware devsprints which I was interested in but also couldn't participate.

Sadly, the second day of devsprint i was really really sick and couldn't make it to the devsprint. Had to spend the rest of the day in apartment. This was a little sad for me but after all the remaining conference was awesome. Meeting people I had met in PyCon India and SHD Belgaum again, connecting more with them, talking more than just tech stuff... Maybe Nokia and Conferences are synonymous - Connecting People. Waiting for PyCon Pune 2018... Hoping to start working in the Web Team again...